Send Your Meetings Live with Microsoft Teams Live Events
|
Published

Microsoft Teams is a collaboration application that is part of the Microsoft 365 suite. It is the central hub of all things communication and collaboration. It enables your team to keep everything organized and truly supports Benjamin Franklin’s quote “A place for everything, everything in its place.” With organized Teams, channels and tabs within channels, you will find yourself locating what you were looking for quicker than ever before.
Traditionally, Teams is a communication and meeting platform, however it also has an extremely powerful Live Events functionality. Teams live events is an extension of Teams meetings, enabling you to produce events for large online audiences with more control over video, audience interaction, and reporting. With support for up to 20,000 attendees per event, you have more ability than ever to reach broad audiences and trust that the platform can support your broadcast.
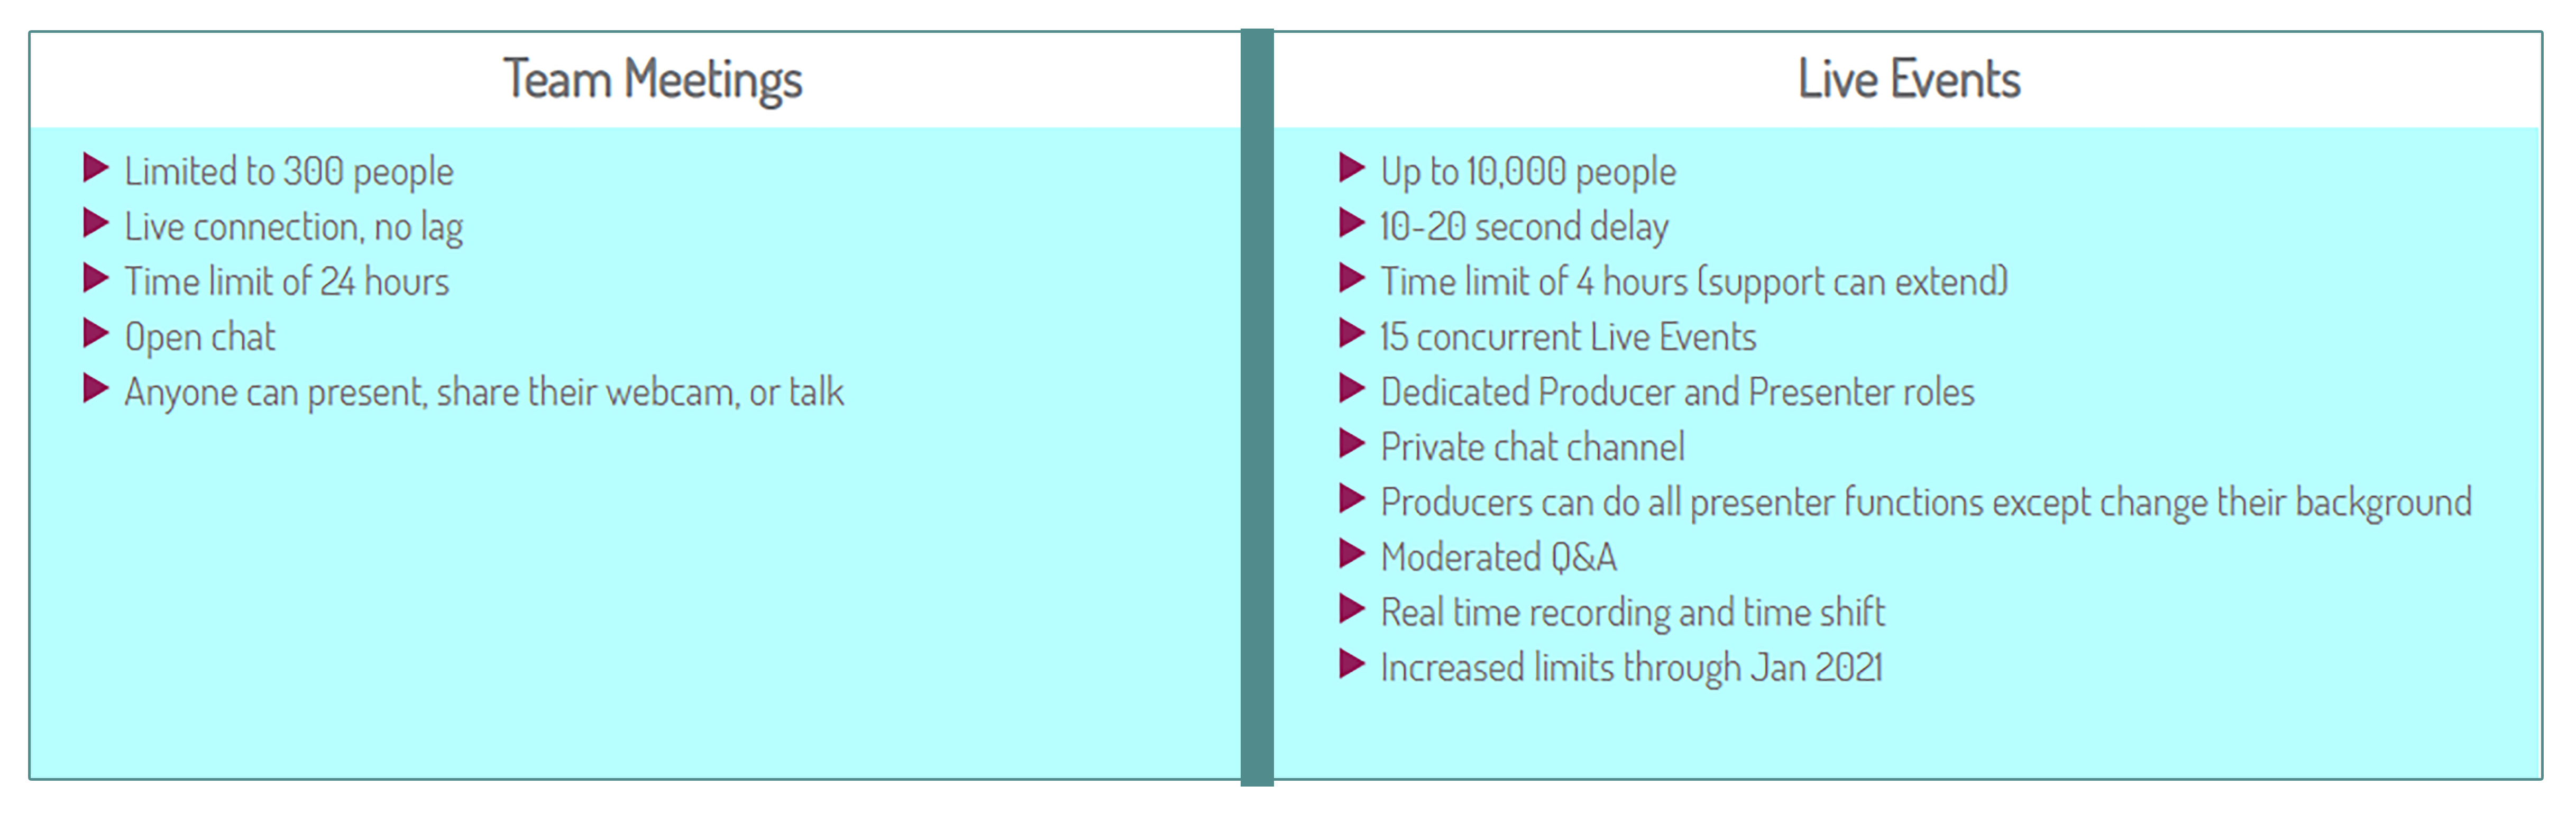
Now it is important to understand when you should leverage a traditional Teams Meeting versus a Live Event.
Teams Meetings vs. Live Events
So you’ve decided you’re ready to produce your first ever live event in Teams; check out the tutorial below to walk you through creating your live event.
Creating a Teams Live Event
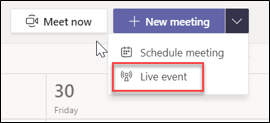
- Start by logging into your Teams desktop client and going into Meetings on the left navigation pane. You will see the + New meeting button on the top right above your calendar. Select the drop down arrow and choose Live event.
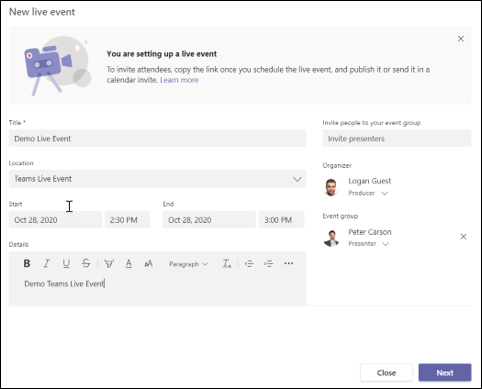
- Enter in the details of your live event including a meaningful Title, Location (which will likely be Teams Live Event), Start/End Date and any details you would like to share with attendees. To the right side, you have the ability to invite additional Producers and Presenters. Producers have the ability to start the live broadcast as well as Present where Presenters only have the ability to present once the event has been sent live. This is crucially important to plan around to ensure you never have a sole presenter unable to begin their own broadcast.
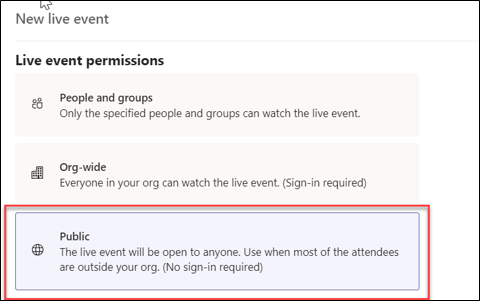
- After selecting Next, you will determine what event permissions make sense to apply to the live event. Your selection will limit the type of attendees who are able to attend the event. If it is a webinar broadcast and you want to encourage everyone to attend, we recommend you choose the Public setting.
- For your first live event, we recommend using the OOTB Teams functionality. We would always recommend checking the below settings. Receiving an attendee engagement report is helpful to see how your content was received by users and Q&A enables users to contribute questions during your broadcast which your producer can moderate. Having this enabled, makes for a very interactive session with attendees. Lastly, update the support URL to a meaningful URL that reaches someone in your organization in the event someone is having issues joining the event.
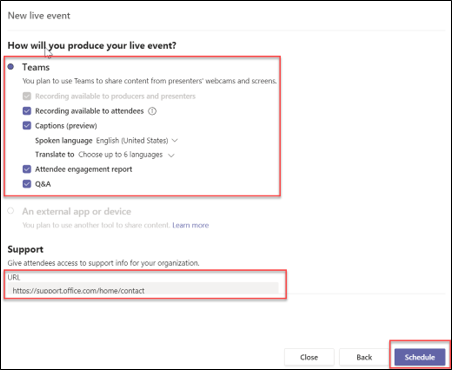
Once you have chosen all your settings, choose Schedule and sit tight. You are soon going to be sending your meeting live in your first live event.
Producing and Presenting in a Teams Live Event
Now you have scheduled your live event, it is time to send the meeting live. At the defined join time, , the single join link that is shared with all attendees will grant you the required access as either a Producer or Presenter within the Live Event. Once logged in, you will be in a pre-live status which means the event is not yet being broadcasted. See below an image defining where to look for your event status.
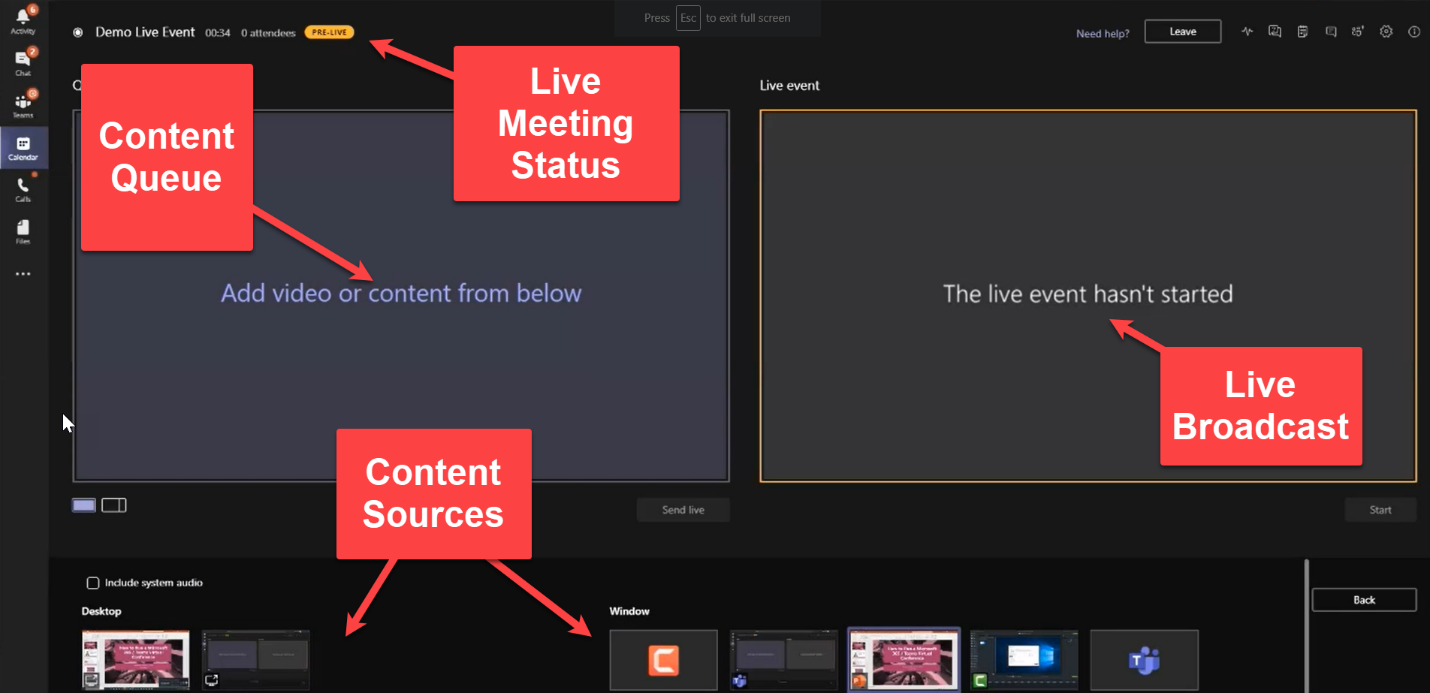
In addition to the live meeting status, you will also notice the content sources. Content sources typically consist of sharing desktops, webcams or a specific application such as PowerPoint. As a Producer you can choose what content source you would like to add to the content queue.
The content queue is the area where you decide what configuration you would like your content to be presented. As a producer, you can mix and match different webcam and content feeds of other presenters as well as your own content. One distinct trait of a producer in Teams Live Events is they are unable to hide their background. If you want to have a custom Teams background, you must have another individual produce the meeting on behalf of you.
If you have your content queued and you’re ready to present, it is time to click Send Live which will push the content over to the Live Event window. Although a slight misnomer, you will still need to click Start to start the broadcast. A very important notice will appear that specifies once you start a Teams Live Event, you cannot stop it, so we recommend setting up separate Teams Live Events for testing scenarios.
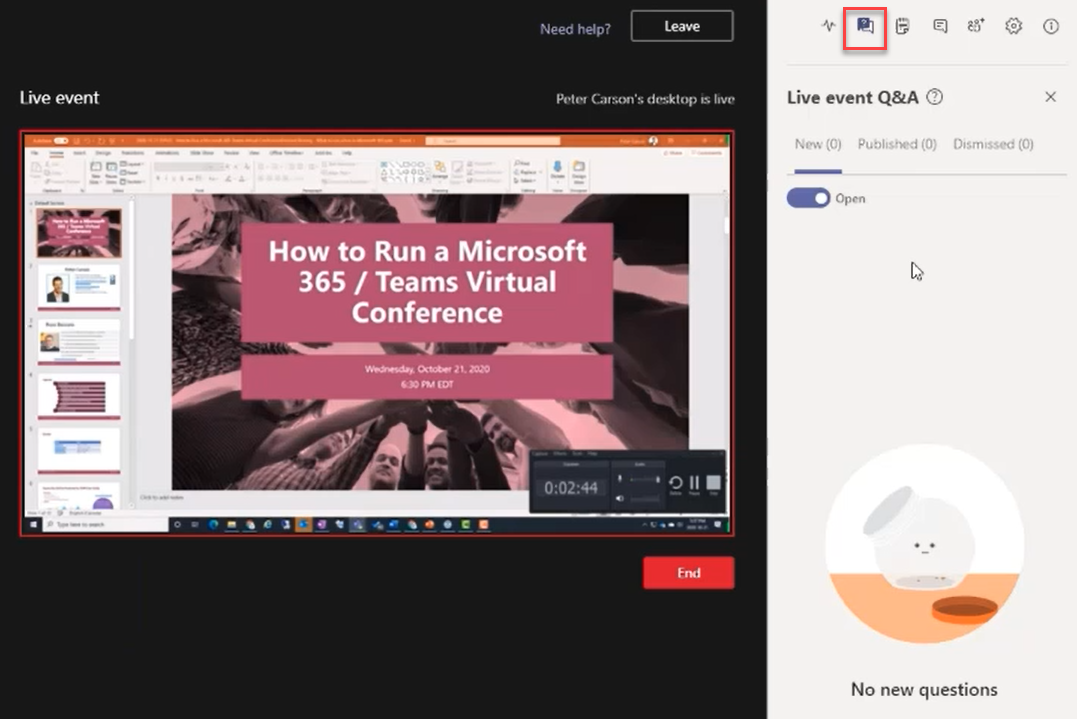
Now that your event is live, there are some other areas worth calling out; the Live event Q&A (if enabled) is the place where attendee questions are submitted. The distinct areas within the Q&A are:
- New – new questions submitted by attendees
- Published – published questions by the producer visible to all attendees
- Dismissed – for inappropriate questions that should simply be deleted
At the bottom of the Q&A is the Make An Announcement button. This is a way to publish a message out to all attendees. If you notice you’re not receiving many questions, it is a good practice as a moderator to make attendees aware they can submit questions.
In addition to the Q&A, there is also a meeting chat which is a private chat between producers and presenters as well as the People pane which will show you who is currently in the meeting as a producer and/or presenter.
See below a video of Peter Carson walking you through how to send your Teams Live Meeting live.
For more information on our experience with Teams Live Events, see the following links,
Sources
Latest Articles
No articles found